Saturday, July 31, 2010

Backyard Ponds - Things To Know When Putting One In Your Yard!

Location

Decide first what part of the backyard you want to
your fish pond to be situated before going out and
buying anything. Select an area where it is far from
the trees since many aquatic plants, like lilies, need
a sufficient amount of sunlight to grow.

Choose an area where there are no falling leaves that
can make cleaning a nightmare. Do not place your pond
on low areas since large volumes of rainwater might
run off and accumulate in the pond during rainy
seasons. Not to mention, these runoff water might
contain fertilizers, pesticides, and other harmful
materials.

Place your pond in an area where it can be best
appreciated and seen. The sense of building a pond is
for you to enjoy it. Select a location where it can be
best viewed (i.e. the sitting area or a patio in the
garden).


Types of Pond

After choosing where you want your pond to be located,
it is now time to select what type of pond you want.
The two types of pond are the following:

ABS plastic preformed ponds are usually used for small
ponds that can contain up to 250 gallons of water.
This type of pond comes in a variety of sizes and
shapes such as hourglass, rock gardens, and kidney.
Waterfalls and formed spillways are also available.

Pond lines or liners are used for any size of pond.
The sizes available for this kind of pond is 10’ x 15’
to 20’ x 25’ or larger. This can allow you to build a
pond to your preferred size either by using them
individually or by connecting together two or more pod
liners with a special adhesive.

These pond liners are very heavy especially the large
ones. They are usually made of rubber. Using pond
liners can be quite a fun and creative experience
since this type may allow you to decide on the shape
of your pond. However, you need to be aware that a 19’
x 26’ liner will not create a pond of the same size.
In choosing the proper size liner, it is imperative to
know the width (W), length (L), as well as the maximum
depth (MD) at their widest points. After which, use
the formula L+(MD*2) by W+(MD*2).

This means that a 10 foot long by 5 foot wide by 2
foot deep pond may require a 14’ x 9’ pond liner so as
to make an edge above the water level. It is important
to let a professional pond developer help in
determining the pond size liner you need.

Dig It

Now that you’ve decided on the location and the type
of your fish pond, it is time to dig it. The average
size of the pond is at least 18" deep at its deepest
point. However, 24" is better. With this depth, the
fishes may be allowed to stay in the pond during
winter time without freezing. Inclusion of planting
shelves in the design will make it easier to place
emergent lilies and plants.

Filtering

After accomplishing the above tasks, it is high time
for you to think about filtration. It may be better to
ask your pond professional about this topic. Just keep
in mind that whichever filter you choose, ensure that
it is cleaned at a regular basis so that the water
will remain clear. Utilizing a filter may also hinder
the mosquitoes from making the pond their breeding
ground.

All Set

And now, all you have to do is add your fish and you
are good to go! All the beauty and enjoyment that you
will have for yourself, friends and family as you entertain
and enjoy your backyard with your new pond.



Dan and Deanna "Marketing Unscrambled"

Wednesday, July 21, 2010

Wild Life Will Love Your Back Yard Pond As Much As You Do!

Water gardens and backyard ponds are for butterflies,
Check Spellingfrogs, birds, fish, you, and the whole family. These
ponds may be small, may even be no larger than 3 to 4
feet in diameter. These may be built in patio
containers and barrels. Drawing wildlife in your
backyard may be done by adding water gardens and
ponds. These will not only provide enjoyment and
interest but also a natural and relaxing environment
as well.


A fish pond in your backyard may become the focal
point of your backyard conversation. So spice it up
with this tips and techniques.

Where to Put Up a Backyard Pond

Place your fish pond in a place where you can best
view it from, whether from a deck or the patio. Make
it coincide with the natural surroundings. Do not
place the pond where the sun can overheat it. Nestle
it in a shaded place but not under the trees.

Do not place the pond under the trees to avoid fallen
leaves into the pond. This technique will also provide
less maintenance to the pond. Expose the pond to
sufficient sunlight only since some aquatic plats grow
well in full sun and others do not.


Landscaping

It is best to slightly elevate the soil surrounding
the pond so that excess water will not enter into it.
Plan the drainage system of the pond, making sure that
it draws the water away from your house.

Landscaping the surroundings around your pond will
provide a natural dwelling place for birds and frogs
that need water and land. Make sure that electricity
is available if you plan to use lights, filters, or a
water re-circulating device.


Using Pond Liners

Pond liners are used to keep water from leaking into
the soil. It is almost always necessary for ponds even
if it they are situated in clay soils. Pond liners
come in different shapes and sizes. They even include
built in waterfalls or any design based on your
preferences. They are durable and convenient.

Consider a polyvinyl chloride liner (PVC liner) in
building larger ponds. In determining the size of the
PVC, you have to know the maximum length, width, and
depth of the pond. After which, multiply the maximum
depth by 3. Add the answer to the width and the
length. Now you have enough PVC to securely hold down
the pond edges.

Pond liners come in different thickness as well. The
thicker the pond liner, the more resistant it is to
punctures. Cement may be considered an optional pool
liner. However, it requires more expertise to install
and it may cost more than the regular plastic pond
liner.

However, considering that many ponds are quite small,
other plastics may be used. It may be cheaper but many
may break down easily once prolonged exposure to
ultraviolet light happens. Some plastics also may
prove to be toxic to fish.

Pond Installation

Time your pond building when the ground is not overly
wet or frozen. Dig the hole according to the right
depth and place (and secure) the pond liner. Then
landscape the pond surroundings. Remove any rocks from
the surrounding area. Add water, plants, and a pump.
Let the pond sit for a few days before adding plants
and fish. Let the plants settle for at least one week
before placing the fish.

Then sit back and enjoy your backyard fish pond!

Dan and Deanna "Marketing Unscrambled"

Friday, July 16, 2010

Some Ways To Tweak Your Back Yard Pond!

Live Like Royalty

Backyard ponds are not only for the filthy rich
individuals. Nowadays, even the simplest homeowner can
make their own backyard pond as luxurious as the
wealthy estates.

Once you get your back yard pond set up, it would
provide both fun and enjoyment. It also provides a
dwelling place for the fish, wildlife, aquatic plants
and flowers. It is a relaxing hobby that not only
provides relaxation but appreciation to Mother Nature
as well.


Plan Ahead for best results.

Building your own backyard pond may not be extremely
hard to built but thorough planning should be placed
in constructing one. The hardest part in building one
is digging the pond. It all depends on what type of
soil your region has. This determines how easy or how
strenuous the digging part would be.

The size and shape of the pond depends on your
preferences. It can be a small, preformed pond or one
that needs a pond liner that can hold up to seven
thousand gallons of water.

Location

Consider the location of your pond. Where would it be
best seen? Picture yourself sitting outside. What
location grabs your eye the most? Consider these
important elements. Is the water source situated just
nearby? Is your pond’s location a flat area? Is
electrical supply available? Keep in mind that these
are just some questions you need to be answered.

Equipment and tools

Building a pond of any size requires a complete set of
tools. Now, take hold of these important equipment. In
building and constructing a pond, one must need a
water pump ( could use a pump for a swamp cooler if
you can find it in your area ), a UV filter, a pond filter,
and some pond plants among many.

Other must haves are the following:
a pond liner of appropriate size, an air diffuser,
pond lights, a skimmer, the aquatic animals, and
fish food.

Tools are also important: gloves to protect your hands,
shovel for digging, rake for smoothing our the dirt, small
gardening tools for planting the plants, water hose for filling
up the pond the first time.

Cost

Another thing to consider in pond building is the
cost. Initially, constructing and maintaining the pond
could be quite expensive, that is with no doubt. But
there are now cheaper do it yourself kits available in
the market. Once it is finished, the enjoyment it
brings is worth it.

Another plus for the backyard pond is that it turns an
oh-so-boring piece of land into a thing of beauty. It
works best if you have the proper landscape to go with
your pond. Make your pond the centerpiece of your back
yard.

However, because of too many do-it-yourself
homeowners, they usually make mistakes. Following
these guidelines may help you avoid the pitfalls of do
it yourself backyard pond disasters.

Initially, it is important to incorporate your pond to
the current landscape of your backyard. This works
best for amateur landscapers who just wanted to get
right down to work. Do not let your pond detract the
beauty of your yard. Make it fit and not out of place.

To Sum It Up

Integrate your pond’s design to your landscape. Do not
make it lavish if you have a very simple backyard.
Take time to choose the design that may flatter the
overall landscaping.

Secondly, think of the essential requirements of a
pond. Do not place your pond in complete shade since
this will hamper the amount of sunlight to your pond.
Aquatic animals and plants need ample amount of the
warmth of the sun.

Finally, size does matter. Plan the size of your
pond. Do not place too much fish on a small pond.
Experiment on a variety of aquatic plants and quantity.

Provide luster and relaxation to your yard as well as
increase your property’s value. Make your backyard
more attractive and enjoyable by adding a backyard
pond to your back yard and enjoy.

These are some benefits to a back yard pond.
* You will see more birds and other animals visiting
your yard.
* If you have traffic noise it can cover some of it and help
you to enjoy your yard more.
* It look nice.
* Adds value to your home.

These are but a few things that you can enjoy about your
back your pond.

Dan and Deanna "Marketing Unscrambled"

Wednesday, July 7, 2010

Ideas For The Smaller Yards That Want To Have A Fish Pond !

Aesthetics

Recently, one of the most popular backyard designs is
adding a water pond or a fish pond to the yard. These
projects, however, can only be achieved in sprawling
and huge yards that has walkways and large areas.


But if you are really certain to have your own fish
pond and yet you do not have a large back yard, there
are design ideas that can be incorporated to hopefully
place your pond in it without having to take up too
much space and dominate your yard.


Let your pond serve as the focal point of your back
yard. Place it in the middle or in one corner of the
yard if you have a small space. Make it appealing to
the people walking around the house.

Location

If you wish to place it in the corner part of the
yard, raise the pond a little higher so that the fish
will seem as a surprise to the visitors. But if you
want to place it in the center, it is best if you
place the pond at ground level or a little above it.


( corner of the yard)

(center of the yard)


Fish Types

Make sure that the fish you put inside are colorful
and lively to attract attention. Watching the fishes
swim around everyday can also serve to be therapeutic.
But if you want to maintain a small pond, do not place
large fishes such as the Japanese Koi. They may not
live long in this kind of environment and they are
also extremely expensive. Goldfish are compatible with
the size of your pond, however, their longevity might
not be a guaranteed in an outdoor pond.


Maintenance

Think how much you really want an outdoor pond and how
you can maintain and build it depending on your
preferences. You might find that maintaining an indoor
aquarium is difficult enough, how much more an outdoor
pond.

Consider the climate of your place. Water ponds and
fish ponds are most applicable in tropical weather
because of the advantage of the sun all year round.
Some aquatic plants need to be exposed to the sun to
grow. The plants and fishes may die if you let them
stay in the pond during winter time. It is best to
transfer them to an indoor tank if the weather is not
applicable.

A fish pond in your own backyard only tells an
individual how much energy, time, and money you are
willing to devote to the beautification of your
backyard. It does not matter how large or how small it
is, it just goes to show that you appreciate beautiful
things. You will not only impress a lot of people but
yourself as well. A back yard fish pond brings a
luxurious and relaxing feeling to the place.

In order to make your fish pond more appealing,
decorate its surroundings. Landscaping the place will
attract frogs and birds which can add to the overall
natural feeling. If you cannot afford landscaping
projects, hanging plants and flowering bushes will do.
This will produce a great ambiance to your visitors
and guests.


Having a fish pond is not a go-get-it-and-have-it
project. You have to maintain and preserve its beauty
time and again. Make sure to add water to it
periodically. It is also important that you get rid of
fallen leaves as this will cause decay and unpleasant
appearance.

Lastly, consult your local pond professionals before
building a pond yourself. Do not hesitate to ask
questions as this will benefit the inhabitants of the
pond. And most important ENJOY IT!

Dan and Deanna "Marketing Unscrambled"

Wednesday, June 23, 2010

Back Yard Pond - Starting The Project!

Aesthetic Appeal

A backyard fish pond offers a aesthetic addition to
your landscapes. Installing projects such as these
will offer tranquility and relaxation to the whole
family as well. However, building, constructing, and
taking care of ponds are not as easy as you think.
Much effort, planning, and money must go into these.
It is important that you think things through before
deciding on installing your very own back yard fish
pond.

Building fish ponds are not as simple as installing it
and letting it go after wards. It is a consistent and
constant endeavor, much like a hobby. Maintenance
should be done periodically. Following some of these
guidelines may aid you in installing a do it yourself
backyard fish pond.

First Tip: Utilize a plastic fish pond liner for your
pond.

In separating the fish pond from the surrounding soil,
it is better to use a plastic liner (PVC liners work
best). It prevents the escape of the aquatic plants,
fishes, and other pond contents from the fish pond. In
accordance to this, it also prevents the entry of
nutrients from the soil or other non pond materials.
This will make maintenance and cleaning easier since
you will only have to deal with the mess and dirt of
the pond itself and the fish that live there.


In building the pond of your preferred size, pond
liners are the option to choose. Usually, they are
utilized for large ponds that do not have pre-formed
sizes available.

However, it is imperative that you choose the right
size of the pond liner. Pond lines or liners are used
for any size of pond. The sizes available for this
kind of pond is 10’ x 15’ to 20’ x 25’ or larger. This
can allow you to build a pond to your preferred size
either by using them individually or by connecting
together two or more pond liners with an adhesive
especially made for this material.

A cement pond liner will also do, however, this option
is more expensive and may require extra labor in
constructing.

Second Tip: Avoid low lying areas.

Installing you fish pond in an area where runoff water
from your lawn flows is one big no-no. This runoff
water will only accumulate in your fish pond, causing
it to overflow and become dirty as well. This is one
of the common mistakes of do-it-yourself pond
projects. Maintaining a fish pond is difficult enough
without excess dirty water coming from your lawn.

On the contrary, installing the pond in an area a
little above the ground or in high parts of the lawn
will prove to be easier to maintain.

Third Tip: Provide sufficient sunlight.

This means that placing the pond in shady areas will
not enhance the growth of the aquatic life. On the
other hand, placing it in an area where too much sun
shines will just cause them to die. Place your pond
where there is enough sunlight to seep through. Most
aquatic plants need sunlight to grow, but some do not.
Research on what plants suit your weather best.


Fourth Tip: Water your plants.


Adding a variety of aquatic plants may decrease the
excess nutrients in the pond. They will also hamper
algae growth that makes the pond murky and dirty.

Consulting your local pond professional is also an
option. Not only will they provide advices to make
your project work, they may also make your work easier
to do.

Dan and Deanna "Marketing Unscrambled"
Thursday, June 17, 2010

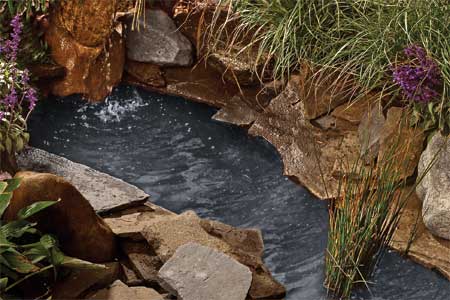
How to Make The Backyard Pond A Center Piece For Your Yard?

Backyard Centerpiece

Homes with waterfront views and accents are admired by
many. This is because being around water offers a
feeling of beauty, allure, and serenity. Putting up
your own water accent in your backyard, such as a fish
pond, will also add that visual appeal. Make your yard
alive with the soothing sounds of water in motion.
Make your fish pond the focal point of your backyard.


However, there are some considerations before
constructing one:

Climate

Consider the climate of your area. If your weather
experiences winter times, then it is best if you make
you fish pond deeper since the fish tend to hibernate
at the bottom of the pond and naturally stop eating
when the water temperature goes below 45 degrees.


If you live in a location where the pond will
completely freeze over, it is imperative that a hole
be created in the ice to help the fish remain alive.
In this case, aquatic plants should be removed and
placed indoors since they may not survive the cold
temperature.

Filter

Consider the filtration system of your pond. There is
what you call natural filtration where it is provided
by the action of the moving water. If this is the
case, considering the design of your system and the
climate of your area, then you do not need a filter
for the pond.

However, to know what is best for your pond, consult a
pond professional concerning filtration. There are
cartridge filters and biological filters available
from shops that provide pond supplies.

Now, to get your backyard pond started:

First step. Make intelligent decisions by educating
yourself.

Do not push through water gardening or pond building
without knowing the essentials about it. Know what
equipment are needed to be used. Find out if your yard
is appropriate to hold such an accent. Is the climate
compatible with your pond? Are you up for the regular
maintenance it needs? Take into consideration the
availability of supplies such as electricity,
filtration, and water. Decide what type of pond are
you willing to make, is it a small one? Or a large
one?

Second step. Decide on the location of your pond.

Locate your pond in an area where the sun will be able
to shine on it. Do not place it under the trees since
it will cause a cleaning nightmare due to the falling
leaves. Do not place your pond where runoff water
tends to overflow. These will accumulate in your pond
making it dirty and murky.

Determine the depth of your pond. The average depth of
a back yard pond is between 18" to 24" usually. Make
the outline of your pond and start digging it. Make
steps in order to provide easy access to the pond
during cleaning. These steps will also be perfect for
holding potted plants just above the water. Make sure
that the bottom is leveled as you dig.

Third step. Get hold of an appropriate sized pond
liner.

In order to get the right pond liner size, take the
width of your pond and add twice the depth of the
pond, and then add 24 more inches. Measuring the
length will be done using the similar formula. Now,
drape the liner over the pond. Arrange it and place
stones around the edges.

Fourth step. Fill it up with water.

Start filling the pond with water. Fold large creases
neatly and remove wrinkles as you fill the pond with
water to make it less noticeable.

Fifth step. Install the needed equipment.

After filling it up with water, place filters, pumps,
and lighting to the pond. Connect it to the
electrical supply. Then add your fish and plants, and
you are ready to go!

Enjoy!

Dan and Deanna "Marketing Unscrambled"

Saturday, June 12, 2010

Do It Youself - Problem Solving With A Gas Furnace !

A lot of people consider the furnace as one of their
home’s most important equipments, which is very much
true most especially during cold winter months, when
getting some heat intake is very important.
Additionally this is the very reason why knowing how
to fix your furnace in case some troubleshooting
problems arise can be very invaluable.


On And Off Problems

If your furnace keeps on turning on and off, this is
usually just a simple problem with the unit’s heat
anticipator. To start repairing, simply locate your
thermostat and open it. When you open the box, you
will see inside a small disk that is located in the
middle. Take a good look at the disc. You will see
that it has a number of calibration notches.


Take a closer look and you will find the word "LONGER"
on it. Then, try to find a small handle that touches a
wire. Once you locate that small handle, turn it
towards the word "LONGER".

After completing the steps, turn on your furnace and
let it run for a few hours. If it works alright, then
you’re done. However, if the furnace is still turning
on and off, just repeat the steps given above.
Continue doing so until the problem stops.

Shut Down Problems

This problem is also an easy one, which is similar to
the first problem. All you have to do is remove your
unit’s thermostat cover, then follow the said steps in
the first problem. But, in this case, what you have to
do is turn the clockwise to "SHORTER", instead of
moving it toward "LONGER". This should fix your
problem. If it doesn’t just repeat the steps until you
get it working.

No Heat Generation

If your unit is not generating
heat, then the problem is most probably the pilot
light. Try to checking out your pilot light and see if
it is turned on or if it is out. If you found it to be
out, then you would have to relight it. In case you do
not know how to relight it, simply consult your unit’s
manual or contact your manufacturer. This is a
relatively easy task that you can do by simply
following some simple instructions.


No Air

If your unit is running but doesn’t blow any air, then
here is how you repair it. First, you should turn off
the power of your unit. Also, you should turn off the
gas from the gas valve which is serving your furnace.
Then, remove the door of your furnace cabinet so you
can have access to your blower.

When you already have full access, check out the
number that is stamped on the belt of your furnace.
Then, go to your local shop and get an exact
replacement of the belt.

Once you’ve got the replacement belt, then go back to
your furnace cabinet and install the new belt.
Generally, you can just slip it on your motor's
smaller pulley then put it on your motor’s blower
pulley. Try rotating the blower pulley using your
hand, while you hold the belt in place. Be careful
from having your fingers caught though.

If you get this right, you should be able to get the
belt right in place. If it looks a little too tight,
then you may need to adjust the motor mount so there
can be more slack in the fixture. After adjusting, try
to re tighten the tension again, once you have the belt
in the right place.

It would be better to check your manufacturer's
specifications regarding the proper tension needed for
your unit. Generally, your belt should deflect at
least about an inch whenever you press it down.

Dan and Deanna "Marketing Unscrambled"

Wednesday, June 9, 2010

Short Term Fix For A Leaking Pipe In Your Home!

Leaking pipes, no matter how big or small it is can
create extreme changes on your water bills, negative
changes to be specific. However, fixing minor leaks is
actually easy and is something that you can manage to
do without calling a plumber. Here are some ways on
how you can repair pipe leaks by yourself.

Fixing Leaks Through Tape

This is considered to be the easiest and cheapest way
that anyone can do to fix small pipe leaks. All the
material you would need is an electrical or duct tape.
The basic principle here is that you should cover the
leak using the tape. To effectively stop the leak, you
should start wrapping the tape before the leak itself
on your water pipe. Wrap in a diagonal manner around
the pipe until you have covered the entire leaking
area and a small portion extending before and after
it.

Fixing Leaks By Epoxy

This method is best used if your leaking problem is
situated at pipe fittings and joints. You can get
epoxy from your local hardware store. First off, you
should cut off the water supply. Then you need to
drain all the water from the pipes. Water purging can
be done by letting the faucet run, until no more water
comes out.

After purging the water, dry out the pipes and clean
it using steel wool. Make sure that the pipes are dry
and clean, since applying epoxy on a wet pipe can give
unpleasant results. If you are sure, then apply the
epoxy and let it dry. Refer to the epoxy’s packaging
on how long you should let it stand to dry up. Avoid
using the pipe line if the epoxy is still wet.

Fix Leaks Through A Pipe Clamp

You can use pipe clamp to fix your leaks. However, you
should buy a clamp that has the right size to fit your
leaking pipe. Once you have purchased a clamp, clean
out your pipe. Be careful in cleaning it, and make
sure that you do this well. Wrap your pipe in a rubber
pad which should be placed over the area where the
leak is.

When you have the pad in place, put the pipe clamp
over it and screw the clamp securely. If you have
somewhat moderate leaks, you can also use this method
to stop them.

Fixing Leaks Through Hose Clamps

Using a host clamp is kind of similar to using a pipe
clamp. However, this is to be only used on smaller
leaks. You can start by wrapping the pipe with a
rubber pad. Once the pad is placed over the leaking
area, put one or two hose clamps over it and tighten
the pad by securely screwing it.

Fixing Leaks Through C-Clamps and Blocks

If your pipe is of a small size, then you can make use
of a small sized c-clamp to patch it. Start by placing
a rubber pad directly on top of the leak. After that,
put a small wooden strip or block on top of it. Get
the c-clamp and place it over the fixture to hold
everything on place. You use the blocks as protection
for the pipe from the pressure given by the c-clamp.

Fixing Leaks Using Tin Can Clamps

Here, what you would need is a tin can. Start off by
cutting the ends off the can and cutting it up one
side. Get the half of the can and bend its ends so
that they are flat and could meet. This is like a
homemade pipe clamp.

Get a rubber pad and place it over your leak. Above
the rubber pad, place your homemade clamp. A c-clamp
and wooden blocks can also be used to tighten the
fixture.

These are best if they are used for a short time fix.

Dan and Deanna "Marketing Unscrambled"

Thursday, June 3, 2010

Fixing A Clog In Your Drains!

Plumbing problems are considered to be one of the
major problems that each household can experience at
least once in a lifetime. Although most would opt to
call a professional plumber to do the dirty work for
them, most plumbing repairs are actually minor ones
that even you can do without having to pay a plumber
some notable amount of cash.

Be Vigilant

One way to fix major plumbing problems is by
prevention. Keeping a sharp eye for sluggish or slow
drains is the key. It is way much easier to fix and
unclog a slow drain than opening one that has wholly
stopped from functioning.

1. If your drain is slow, you can fix this by simply
pouring scalding water down the pipe. Do this to
loosen any grease buildup. Additionally, you should
clean the drain screen or stopper. This should do the
trick.

However, if it doesn't, then try to locate the problem
by checking out other household drains. Do this to
know whether the clog is present in only one fixture.
If it turns out that other drains are clogged, then
you may have a problem with your main drain pipe.

Sinking In

2. Fighting a sink clog automatically means getting a
bathroom plunger. In picking a plunger, make sure it
has a large enough suction cup that can completely
cover up the drain. It should also be able to create
an airtight seal around the surrounding sink.

Next, you should fill the fixture to completely cover
the plunger’s suction cup. Do this by using water or
coating the cup’s rim with petroleum jelly. You should
create a vacuum by trying to seal off other outlets,
like overflow drain in sinks. Then, push out any
trapped air underneath the cup. After this, do 15 to
20 forceful up-and-down pumping blows to jerk loose
the clog. It may take you three to five times of this
cycle to do the trick.


3. Snake It Out If using the plunger doesn’t work, then
you would have to resort to another technique. In this
remedy, you would need to have a plumbing snake. You
can get one at your local hardware. These can work
their way through your drain pipes and physically push
out the clogs.

Plumbing snakes are considered to be one of the most
dependable tools for fixing drainage problems. All you
have to do is push the snake in until you hit the
clog. Once you hit the clog, hook it up by twisting
your snake's handle. After hooking it up, push your
snake back and forth until you feel that the
obstruction has broken up. Then, flush out the pipe
using cold water.


Main Drain Cleanup

If you detect that more than one of your draining
fixtures is clogged up, then your main drain line may
be the problem. Thus, you have to clean it up. You can
start off by locating the clean-out plugs of the large
drain pipes. You can find these in your crawlspace or
basement.

4. Main drain lines can also be found in your garage or
somewhere outside, along the foundations of your
house. You can see that each plug has a cap on it that
has a square fitting on the top. Use a wrench to
remove the cap.

Make sure that you have a bucket with you to catch
some dripping water. Also, be sure that nobody will
use the facilities while you work on the main drain line that is
open, or else some serious problem can come your way.
Once you have everything in place, use a plumbing
snake to break up any obstructions in the main line by
running the snake in all directions of the pipe.

Dan and Deanna "Marketing Unscrambled"

Saturday, May 29, 2010

Do It Yourself- Repairing A Cartridge Faucet !

Repairing a modern type of cartridge faucet can be one
of the easiest home repairs that you can do. In
general, anybody can do this, with or without
experience with plumbing. In fact, you can even coach
someone over the phone about the whole process and
still get good results. All you would need is pay
close attention, and you would be done in no time!

General Problems

The most common problems encountered in cartridge
faucets, is usually caused by a problem in the
interior cartridge, which usually wears and tears over
time. Nevertheless, there is no need to worry since
this type of faucet was created with simplicity of
repair in mind.

Getting Started: Purging The Lines

To start off, you need to purge your water lines. In
order to do this, you should turn off the entire water
source that is running to your faucet. Try looking
beneath your faucet and there you can see the shut off
valve that cuts of the water source. If you don’t have
one somewhere near your faucet, then you would have to
turnoff the main valve.

If you have to deal with the main valve, take note
that it would take you longer to purge. Most
households have a shutoff valve feature that is
directly placed under the sink, so it is the least of
possibilities that you need to shutoff the main valve.

After you have cut the water source, turn on the
faucet. Let the water keep on running. Try to wait
until all the water in the pipes has emptied, and
before you proceed to the next step, double check
first if the water lines are really empty.

Working On The Faucet

Now, to start working on the faucet itself, you need
to remove the sink handles. You would have to unscrew
them. Locate the protective cap and pop it off. This
is where you would usually find the screw. You can use
a butter knife or a screwdriver to do the trick. While
doing this, try to be very careful so that you do not
scratch it. In this way, it would still look nice
after the job. Now you can start unscrewing the knobs
until you completely remove them.

If you already know which type of cartridge it is that
you need, then the better. If you don’t you can simply
bring your old one to your local hardware and people
there will be able to help you out.

Once you get the new cartridge, go back and install
it. Then, replace the knobs. Turn the water back on.
When you are done with this, try testing out the water.
If the test runs smoothly without problems, then
you are done.

However, if you experience some water leaks during the
test, you have to do some adjustment again. Turn off
the water source and take off the knobs once more. Try
to check and ensure that you placed the cartridge in
the right position. If it’s not, then try to maneuver
it into the right place.

Put the knobs back into place and turn on the water
source again. Try the water test once more. If this
time it runs smoothly, then you have reached success
with your repair. If you are still experiencing
problems, then you may have a problem coming from a
different source.

Dan and Deanna "Marketing Unscrambled"

Saturday, May 22, 2010

Cracks In A Basement Wall - How To Evaluate It?

If you are seeing some cracks on your walls, there is
no need to panic. This can have no significance at
all. However, there are some that can signify that you
are experiencing a big structural defect. If this is
the case, then you would have to do the appropriate
action for the case. This is why proper evaluation
should be done.


Noticing The Problem

Most often, cracked foundation walls are given
attention when a property is being sold in the market.
Even though the owner would insist that the cracked
wall has been like that "forever", the buyer has a
tendency to become concerned about the situation.

Whether you are a buyer, seller, or some one who is
simply concerned about their wall, here are some
important points on evaluating your wall if it needs
repair or not.

Causes And Factors Of Wall Cracking

Foundation walls that are built using concrete blocks
are much predisposed to having cracks than solid
concrete walls. This is especially true if an 8-inch
block was used for the block wall.

Of course, foundation walls should support a
building’s the vertical weight. Plus, if its around a
full basement, it should be able to resist lateral or
inward pressure from the soil outside that are against
the wall. If water saturates the back fill or soil,
then the inward pressure could easily overload your
block wall, which can result into cracks.

Additionally, roots of large and moderate sized trees
that are near your foundation wall can also cause you
major wall problems. Most of the time, roots grow
toward your walls due to the water accumulation along
it.

Seeing The Signs

Horizontal cracks on mortar joints are usually caused
by too much inward pressure against its block
foundation. If you see a horizontal crack that is
about high as half of the wall, then this can be one
sign of too much lateral pressure from the soil.
Sometimes, you may also find some step cracks or short
and small horizontal and vertical cracks near the end
of a wall. This too is a variation of soil pressure
cracks.

When To Be Alarmed

Usually, block foundation walls can remain cracked for
about a number of years without any noticeable
cracking additions or inward bulging. But, the moment
you get a horizontal crack, your wall’s structural
integrity is very much reduced. Additionally, if the
soil back fill is saturated, especially during rainy
days, the number of cracks could increase or, worse
comes to worst; your wall foundation can collapse.

Solution Choices

Problems like these are possible to be permanently
repaired. In fact, there are methods in which you do
not need to have a complete replacement, provided that
the inward movement doesn’t exceed one inch in
relation to the bottom of the wall. You can usually
find the maximum inward deflection where the
horizontal crack is and near its mid-height.

One method you can do is bracing your wall with
reinforced block piers or steel post-braces. However,
if you are concerned with the cost, you may want to go
for steel post-braces since they are less expensive
than the other. However, if it is the overall look you
are after, then you may want to use piers since they
can give a better finished appearance.

It might be needed to call in an expert in this field
but this gives you what you need to know to evaluate
the condition to know when the expert if needed.

Dan and Deanna "Marketing Unscrambled"

Thursday, May 20, 2010

Do It Yourself - Fixing The Squeaking Doors In The Home!

Squeaking doors can be a really irritating problem.
Although many would consider it to be a major problem,
it isn’t! In fact, it’s a minor house problem that
even you yourself can fix, and here’s how to.


Stop, Look And Listen

First, you should know where that squeaking sound is
coming from. You can do this by stopping, looking and
listening carefully. You should perform the "swing
test" first before you go off buying a whole new door.

Start off by making sure that your surroundings is
quiet. Then, you should stand on the side of the door
in which you remember that the squeak was loudest.
When you’re in position already, swing the door in a
gentle manner, covering its complete arc. Do this
action repeatedly and try to vary the speed while
doing so.

While swinging the door, you should take note of some
factors. Try to note exactly where the squeak comes
from. Then try to note when it is loudest. See whether
it is loudest when you swing the door fast or slow.
Then lastly, find out why exactly the squeak is
happening. Finding out why is a very crucial factor,
since this dictates what remedy you should use.

Two General Remedies

Once you’ve determined where the squeaks are, you can
do two general remedies. First, tighten all the screws
in the hinges. Then, get a flat-headed screwdriver.
Carefully tap its blade in between the hinge body and
the hinge-pin head to separate them.

After doing this, get a 3-in-1 sewing machine oil and
squeeze in a few drops of it into the small space
between the pin-head and the hinge body. If you don’t
have sewing-machine oil, you can also use a WD-40, and
spray some into the same space.

By applying some lubricant in the space, you enable
the lubricant to seep in into the remaining length of
the pin, which is inside the hinge body. Thus, you
give the best lubrication coverage that you can give
for the hinge.

Doing this would generally resolve your squeaking
problems-if you were accurate on determining the
source, that is. However, if you pinpointed the wrong
source, then most probably your squeak would still be
there.

All Hope Is Not Lost

If you pinpointed the wrong source of the squeak,
don’t worry then! By this point in time, you have
determined that the hinges are not the problem. Then,
most probably it’s a wood on wood kind of squeak
problem.

To solve this kind of squeak, you would have to do the
squeak test again. After which, you have to release
the bind, since the problem may be the hinge binding
on the wood. While performing the swing test, heed on
how the door’s hinge-side settles into the door-jamb.
Also, take note of how it makes a final contact with
your door-stop.

This is when stop, look and listen wouldn’t be enough,
since you would have to make use of touch. If you feel
that it has springy feel, when the door is
approximately in the closed position, odds are very
good that it is hinge-bound. This can be the cause of
the squeak since the door is forced to rub with the
jamb material. To repair this kind of problem, you
need to remove your door by removing the screws on the
hinges’ jamb side and leaving the hinges intact with
the door itself. Then, you need to chisel out some
hinge recesses towards the direction of the hinge
barrel. Then, reinstall the door and perform the swing
test again.

If this doesn’t solve your problem, try chiseling out
more recess. It can be a trial and error process.
However, it can be fixed.

Dan and Deanna "Marketing Unscrambled"

Saturday, May 15, 2010

Tips On Tiling A Floor !

Tiling is one job that most people would rather not
learn how to do since it can be scary that you make
some mistakes in the process. However, it is actually
a lot easier than what many might think. In fact, it
can save you a whole lot of money contrast to hiring a
professional for the job. As long as you know the do’s
and don’ts, then this task is a no-brainer for you.


Choosing Your Tiles

To start off, you have to choose the tiles that you
want to use. You may get surprised with the number of
variety choices when doing this. Tiles may come in
different sizes, colors, textures, materials and
finishes. There are times that you may encounter tiles
with odd sizes. This is done on purpose by companies
so that you would have to buy extra.

Choosing a tile highly depends on you. It can also
depend on how you want the room to be and the over all
design and feel of the room.


Measurements And Computations

You also need to measure out your floor area. You also
have to deliberate on whether you want the tiles to go
under any kind of fittings and units. Generally, it is
better if you tile under the fittings. This is because
if you would have to move appliances in the future,
like a fridge, then you do not have to lift it up over
the edge of your new tiles.

When you have chosen what kind of tile you want to
use, you need to do some computations. You have to get
your floor’s width and divide it by the width of one
tile. This is to know the number of complete rows that
you’ll have. Also, this can help you decide the
optimal wall edge to place your cut tiles against.

It is better to plan it out and measure twice and cut
once than to have to use up a lot of tile by having the
wrong cuts.


Application

Make sure that the sub - floor is level. If it is not level
it will cause the tile to crack and break. If it is not ask
when you are buying the tile what you need to do to fix
it before you start laying the tile. If you do it right the
first time then you will not have to do it again for a long time.


After doing the math, you can now start applying tiles
on your floor. Be sure that you have an even coverage
of adhesive placed on your sub-floor. The type of
adhesive to use would depend on your sub-floor or the
surface you are tiling. If it is a concrete floor,
then you can use a rapid setting adhesive. However, be
sure that you do not spread too much of the mixture at
once, since it can set as fast as 30 minutes.

If it is a wooden sub-floor, then you need a flexible
adhesive. You can know if an adhesive if flexible if
it is written on the bag or the tub. If you have
slate, then you need to use gray adhesive. If you’ll
be having marble, then you need a white adhesive. This
is so that no color coming from the underside would
bleed and ruin your design.

Where you buy the tile can help you to answer some of
these thing when you buy the tile to make sure you get
the right things for the products that you are using.


Grouting

When you are done fixing your tiles on the floor, and
after you have allowed enough time for it to dry, then
you would have to do some grouting. If you have
natural tiles, like marble, slate, limestone, granite,
travertine, and porcelain, you need to seal them first
before you can grout them. You have to use a
specialized impregnating sealer so that they will be
waterproof and can be more resistant to dirt and
staining.

Mix up the grout and apply it using a grout float to
your tiles. Try to work over the gaps until they’re
all filled. If you have white marble tiles, then you
need to use a white grout instead of gray since the
gray kind can stain the marble.

To finish off, wipe out the excess grouts that are
bulging from your tiles using a sponge. Also, use a
grout finisher or your finger to smooth out the grout
lines. After this, stand back, relax and chill while
you wait for your work to dry up!

Dan and Deanna "Marketing Unscrambled"

Monday, April 19, 2010

House Painting - Tips For Fixing Some Of These Problems!

Paint is considered to be the clothes of your house.
Although paint problems may look ugly and major, you
can actually be saved from the obligation of calling a
professional painter and spending huge amounts of
money on them. You yourself can be your very own
Picasso in doing paint retouches of your house.

Break Down

All kinds of paint, whatever brand it may be, can only
last for a specified number of years on your wall,
before the break down process starts showing. When you
are experiencing paint break down, it basically means
that the first or primary layer on the surface is
weakening.

This problem is commonly experienced in old houses
that have several paint layers. When the break down
process starts, paint will start cracking and peeling
from your wall or your wood surface. Because of this,
your wood or drywall will be exposed.

To fix this, try scraping or pressure washing your
surface. After that, fill any holes using putty if it
is wood or Spackle if it is a wall surface. After
filling in, get a sand paper and fine sand the
surface.

When you’re done, wipe of the dust and let it
completely dry. Basically, when you pressure wash or
when it is raining, 24 hours should be allotted for
the surface to dry. Once you’re sure that it is dry,
and then you can start painting.

Moisture Build-Up

Another cause of paint cracking is moisture build-up,
leak or excessive condensation.

Most probably, you can find mildew and mold along with
this problem. This kind of problem is often
experienced in the bathroom. However, it can also
occur in other parts of the house because of leaky
roofs and close outdoor shrubs. Your paint can sag
down due to the moisture. But in this case, you won’t
see any chipping debris.

If moisture build-up is the cause of your paint
cracking, then you would have to do another remedy.
Since you will be targeting on the mildew, and if it
is an interior surface that you are fixing then you
can make use of a solution that consists of three
parts water and one part bleach. If it is an exterior
surface, you can wash it off using an exterior
solution intended for pressure washers.

Both of these can be bought at your local shop. You
can also try renting a pressure washer from some
stores that provide services like these during the
weekend.

Fading Color

The last most experienced paint problem would be
fading color. This is usually experienced with
surfaces on the exteriors of the house. However, it
can also occur indoors when specific colors were used
for the walls. Basically, paint color fades when it
exposed too much to the sun.

To avoid this kind of problem, most people would try
no to use bright and bold colors such as deep red. If
you have an affinity for deep colors, but don’t like
the fading ones, then try to look for hues which have
a ruddy or golden tone with them.

You can try consulting a paint associate about this.
Try to find out how much red oxide or yellow oxide
colorant was mixed for the specific color that you
want. Basically, if the paint associate says that each
colorant has about 1 ounce or so in the tint base to
create the color, then you have spotted a color that
can resist fading for a very good period of time.

Dan and Deanna "Marketing Unscrambled"

Tuesday, March 30, 2010

Tips To Replace A Faucet !

Faucet replacement is a very easy task that anyone can
do. It is one of those household repairs that don’t
really need any professional assistance. Here are the
basics that you should know about faucet replacement.

Being Prepared And Choosing Your Faucet


Before you go off with the replacement proper
procedures, you should be ready and have with you the
faucet unit that you want to use to replace your old
one. You can drop by your local hardware store and
pick out a faucet that you want. Having it on hand
before removing the old one would make things easier
and faster for you.

With the numerous modern designs now at the market,
you have a variety of faucet designs that you can
choose from. For your bathtubs and sinks, you can get
single or double handled faucet. Generally, faucets
have a standard size regarding their hook-ups,
depending on their use. For kitchen faucets, you can
usually find units with an 8 inch hookup. Bathroom
vanity faucets usually come in 4 inches, while
bathtubs come in 8 inches.

Faucet Measurements

In able to know which kind of faucet to get from the
store, first you have to do some measurements. Have
your tape measure in hand for this task. If you will
be using a double handled faucet, what you need to do
is take the measurement from the handles’ center to
center, thus, this is your faucet’s size. If you will
be using a single-handled faucet, you would have to
measure starting from the the distance in between your
water hook-up lines placed on your faucet’s bottom.

As soon as you know the style and size of your faucet,
then you’re already to take out the old one and
install your new unit.

Tools That You Need

Basically, you do not need a lot of tools for this
task. All you need to have are wrenches so that you
can hold the shut-off valve and take out the supply
line that is going to your faucet. Also, you would
need to have channel lock pliers or a basin wrench.
You’ll be using this take out the large nuts, which
attaches the faucet to your sink. It would be better
if you use a basin wrench, due to its special design
that is intended for working in tight spaces, just
like where your faucet is mounted to your sink.

Steps To A New Faucet

First, you should turn off all water supply that is
linked to your faucet. Then, you should remove the
supply lines coming from both sides of your faucet.
After that you should remove the large retainer nuts
that are holding your faucet to the sink. When you are
done with this, remove the old faucet from the sink.
Try to clean up your sink and where the old unit was
installed.

Once you are done cleaning up, get your new unit and
place it in the holes. You can ask someone to help you
with this, so that keeping it centered while
installing the retainer nuts below would be easier.
When you get the faucet in place and retaining nuts
tightly screwed, then you can now get your water
supply lines hooked up again. Turn on your water
supply and do some tests for leaks and other defects.

If you have some leaks, try reinstalling it again and
make sure that you tightly place each part where they
should be. Also, if you want you can use plumbers
putty or thread tape to prevent leaks or dripping on
the joints, specifically in between the faucet and
sink, or the supply line and the faucet.

Dan and Deanna "Marketing Unscrambled"

Friday, March 19, 2010

Things That You Can Fix Yourself - Garbage Disposal Problems!

Fixing disposal problems is actually a simple job, if
you’re equipped with the right knowledge. Nonetheless,
a lot of people are still scared on dealing with
garbage disposal problems, which usually lead to
freaking out and calling a professional to get some
help. To save you from this dilemma, here are some do
it yourself solutions for you garbage disposal
problems.


Noise Problems

One common problem encountered with garbage disposals
is that they may produce too much noise when used. You
might hear some rattling or grinding sounds, every
time you turn it on. If noises like these are present,
it is probably caused by an object, possibly a metal
which was unintentionally dropped down your disposal.

Having this kind of problem unattended can cause
damage to your disposal blades. To fix it, turn off
the electrical power for that area of your house.
Then, get a flashlight and a needle nosed pliers.
Using these, look for an item which causes the noise.

Once you find the item that simply doesn’t belong
inside your disposal, and then pull it by using your
pliers. After this, the noise should be gone and your
disposal will do just fine.

When Nothing Happens Another commonly experienced
problem is when nothing happens when you turn on the
disposal. Generally, if this is the case and you can’t
hear even a single hum, it means that power isn’t
getting into the disposal unit.

It could be that you have to reset your unit or your
circuit breaker is tripped. First, you should look
beneath your sink and take a look at your unit. You
should find a small red button placed somewhere on the
bottom side. Press the button and hold it for a number
of seconds.

After pressing, try to use your unit again. It should
start normally, as if it is brand new. If it doesn't
start, then you have to do another trick. Find your
electrical panel and see if you have a tripped circuit
breaker. Try to reset the breaker that is in charge
for that area. After resetting, go back to your
drainage unit and do the first step all over again.
This should fix the problem.

If nothing still happens, then it’s about time that
you call a professional, because it can be a sign of a
bigger overall problem.

Humming But Nothing

This is the last real possible problem that you can
encounter with your disposal. Sometimes if you place
wrong kinds of food in your unit, it gets jammed up.
This can also happen if you put too much food down
your disposal without running it.

To fix this, turn off your unit’s the power and use
pliers to reach into your unit and pull out whatever
it is that is obstructing the blades and keeps it from
spinning. After you have pulled the clog out, get an
Allen wrench and use it to spin the blades manually.

If the blades are now turning, then you are done with
the problem. If it’s still not spinning, this means
that there are still more that you should remove. Be
sure that you remove everything out, so that you won’t
encounter the same problem again in the near future.

Once you got the blades spinning manually, try to turn
on the power, reset your unit and see if it’s working.
If it’s still humming, then check for more clogs. If
you’re sure that there are no more obstructions and
the problem is still there, then you’ve got the green
light to call a professional.

Dan and Deanna "Marketing Unscrambled"

Monday, March 8, 2010

Say Hello To Our Friends That Have Joined our blog!

We would like to welcome the two additions to our
blog.

The Wig Mall

( example of a wig)

this is a link to it but can also be found at the side of the page
under Other site that we love.

Also in the same area is great site that we would love
for you to check out Madame Pumphrey Jewels For The Crown


(hand made by our friend and fellow blogger at Full House )

We are glad to have our friends with us on the blog. We hope that
everyone will check them out and see the great things that
they offer.

Dan and Deanna "Marketing Unscrambled"

Thursday, March 4, 2010

How Can You Go Wrong With White When Decorating ?

When you are decorating your bedroom you should go
white. White can give you many different looks you are
trying to achieve like the eclectic bedroom,
minimalist, modern, and more. In addition, for a very
low cost, you can have an amazing look in your
bedroom.

If you are looking for an eclectic look in your
bedroom then you can use the white to accent and
create an airy expanse with touches of earth tones
throughout the room.


Keep the walls white and maybe use a white comforter
with earth toned bed skirts, pillows, floors, rug, and
headboard.

The minimalist bedroom is easy to create and looks
fantastic in a room with dark wood flooring. Go for
the solid white walls, white bedding, and a white rug.
Use paintings with dark frames and white edges to
bring out the look.


The white will bring out the dark tones of the
flooring and the dark furniture and look absolutely
fabulous. In addition, the bedroom will remain light
and bright which is very nice.

Small bedrooms look very good with a modern look when
you take advantage of the use of white. You can create
a small focus point on the wall with a painting or a
picture, white bedding, and a colorful rug.


You want to warm up the room with browns and greens in
the furniture or the fabrics you use for the modern
look. This will make the room look much bigger and you
will be pleased with the outcome.

White in the bedroom can give you many different looks
you are hoping for. You don’t need to worry about
using many patterns and colors to have an elegant
looking bedroom because white really works for all
styles.

Dan and Deanna "Marketing Unscrambled"

Wednesday, March 3, 2010

Decorating Your Home - Add Style By Bringing The Outside, Inside With Plants!

If you feel like your room is missing something and
you want to add a little extra then you should think
about adding fresh flowers and plants. You will be
amazed at the difference a tree, plants and flowers
can do for your room.

You might not be a big flower lover but if you are,
then you might want to look at decorating your room
with fresh plants that bloom flowers.


There are hundreds of different indoor flowers you can
choose from that will brighten up your room and look
absolutely fantastic. You don’t have to decorate with
flowers.

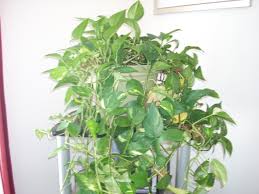
You can find indoor trees and tall standing plants
that will make a big difference in your home also.
Vines and hanging plants are an excellent way to
spruce up a room too.


( trees, vines and flowers)


When you decorate with flowers, plants, and trees it
also changes the mood of the room. Plants are known to
provide a calming effect on you and make you feel
great.

Added health benefits!

In addition, you are adding additional oxygen into
your home and removing toxins when you add plants
throughout your home. So, not only are you decorating
your home by making the rooms beautiful with nature
but you are taking advantage of the natural benefits
plants have to offer.

When you decorate your home or you are just looking
for accessories for something additional you cannot
forget to use plants, flowers, and trees. Your rooms
will look amazing with the difference you can make by
adding nature to your home.

Dan and Deanna "Marketing Unscrambled"

Adding Style To The Bedroom With Lighting!

Lighting in the bedroom is extremely important when
you are decorating. Many people often forget about the
lighting and it really makes a big difference when you
are decorating your bedroom.

The first thing you must think about when you are
designing the lighting in your bedroom is layering.
You must layer the lighting.


When you layer the lighting in the bedroom it gives
you the opportunity to create the different moods you
are hoping for. You should always have lamps on
bedside tables and another light across the room
diagonal from the bed.

( bedside table lights, overhead light other light sources)

This allows the lighting to be balanced in the room.
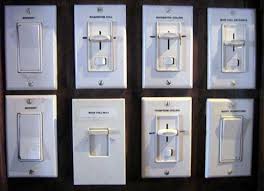
You also might consider light sources on a dimmer
switch that allow you to select the balance of light
that is emitted into the room.

(many styles to choose from)

One thing you do not want to do in your bedroom is
have a ceiling fan with a light on it. If you must
have a ceiling fan in the room then it is fine.

You should not have a light drooping from a ceiling
fan because it looks tacky. Your bedroom needs to have
the sexy look and a light from a ceiling fan will ruin
the look.

It is also a good idea to use different bulbs for the
lighting in the room to give a different look. Using
recessed bulbs with floor and table lamps can give the
look of washing the room with a soft light.

However, you also are layering the room with different
lighting and it gives the look of pure elegance that
you need to accomplish a nicely decorated bedroom.

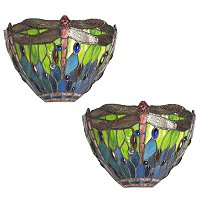
The light fixtures are just as important as the light
itself. They can add to the beauty of the room or take
away from it.


( wall sconces come in all different styles- modern, stain glass and
more of a retro look. They add to the room without taking up
table space.)

Recessed lighting can add a different look to the room.

Give your room elegance, beauty and balance with lighting.

Dan and Deanna "Marketing Unscrambled"